Hello everybody,
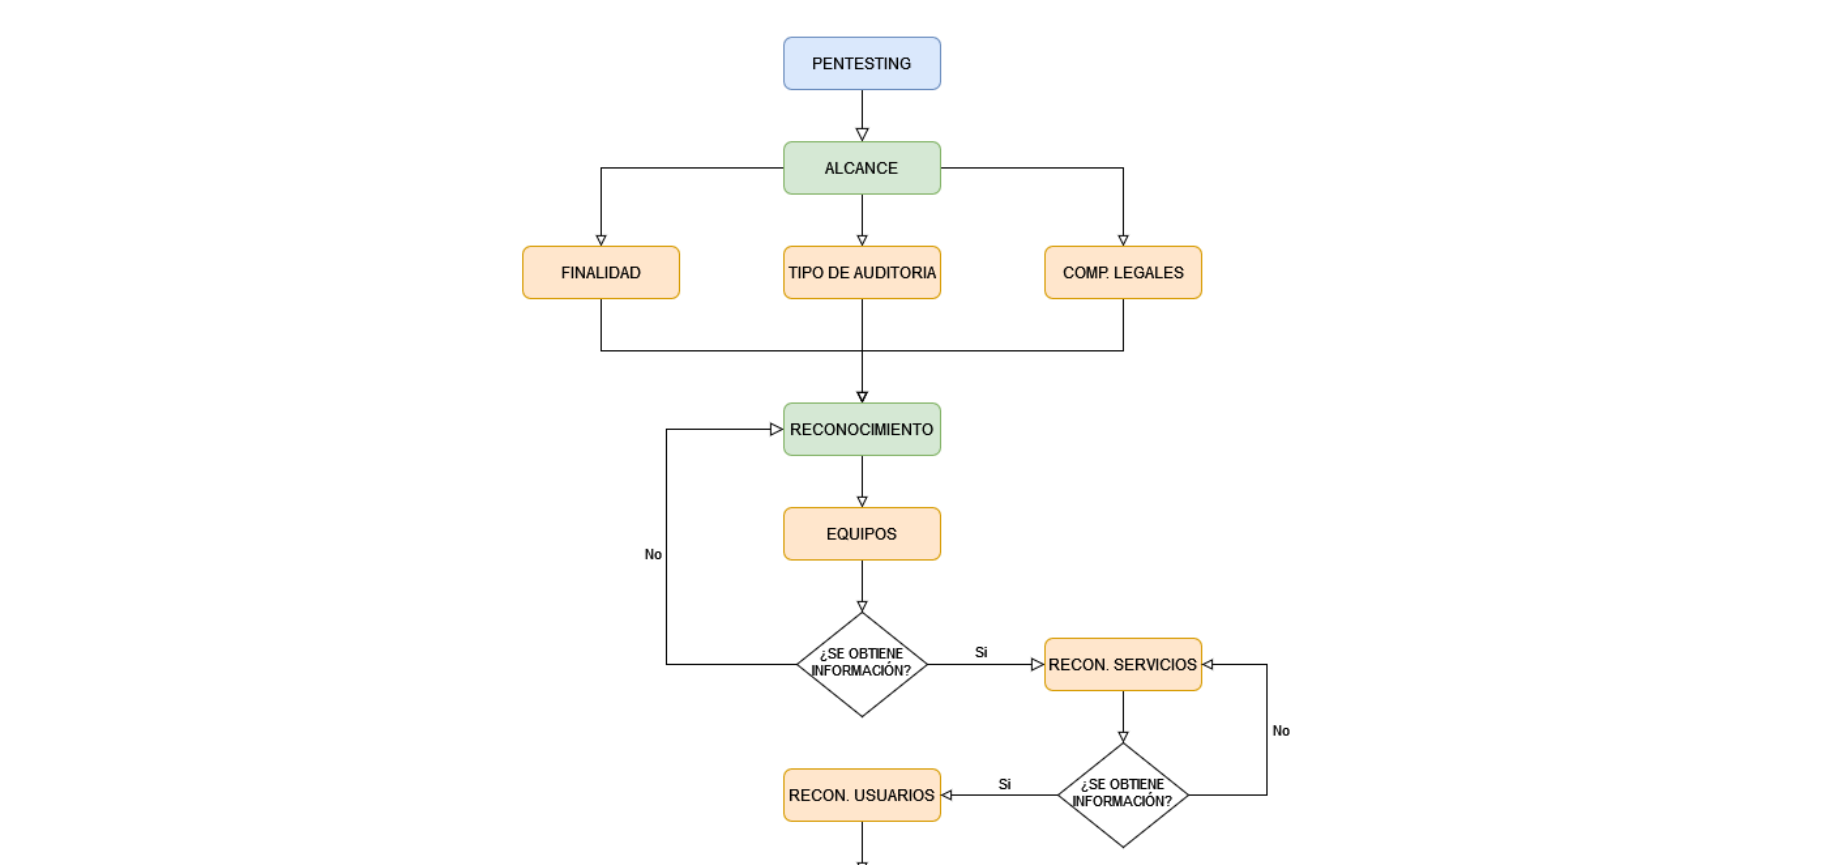
After introducing the proposal to be developed by the pentester, let’s get down to business by presenting the next stage of the methodology, Recognition.
Introduction
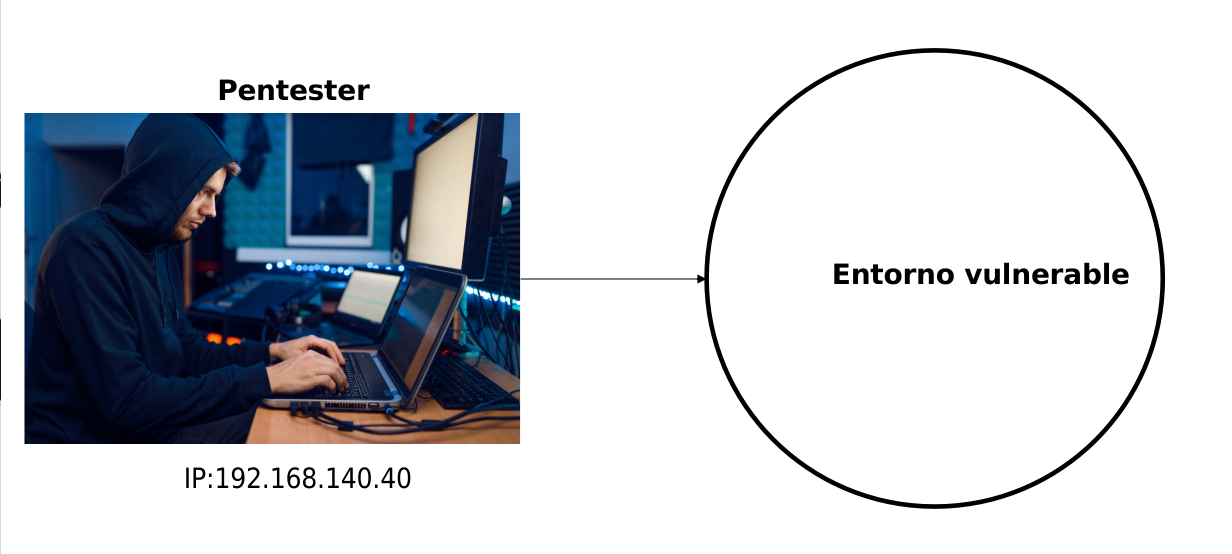
After establishing the scope of the audit we find the following situation, the pentester connects to the vulnerable environment and the network itself provides it with an ip, thanks to the DHCP protocol.
Acknowledgement
This phase will depend on the type of audit established:
- Black box: the pentester should obtain as much information as possible from open and accessible sources, generally using OSINT (Open-Source Intelligence) techniques.
- Grey/white box: the pentester should list all services available on the agreed systems to attack them in the following phases.
At this point all vulnerable network computers and possible available users of the AD will be searched.
Computer reconnaissance
With the systems deployed and the pentesting OS active on the same network, a recognition of the computers on the network must be performed, using the command:
1
ifconfig
You can find out in which network segment the pentesting OS is located, in the case of this project all computers are in the network range 192.168.140.X with netmask 255.255.255.0.
The recognition of the computers in the environment can be done using several tools that perform queries to the protocols used by Windows systems, such as ARP or the SAMBA protocol; in this project it will be done using the SAMBA protocol, which will be explained later, through the tool crakcmapexec with the command:
1
cme smb 192.168.140.0/24
The result can be seen in the following image:
If no machine is found after the search, you should try to change the network and rescan it for new machines or via other available protocols.
This command presents all the available equipments with the SAMBA protocol:
- Their ip.
- Their network name.
- Its operating system.
- The domain to which it belongs.
- If it signs the protocol, in order to protect the network, as we will see later.
- The version on which the protocol is supported.
As can be seen, a total of 4 computers have been recognised on the network, we will focus on the attack on the client emulated with the Windows 10 machines and the AD emulated with the Windows Server 2016 machine.
So the current status of the audit would be as follows:
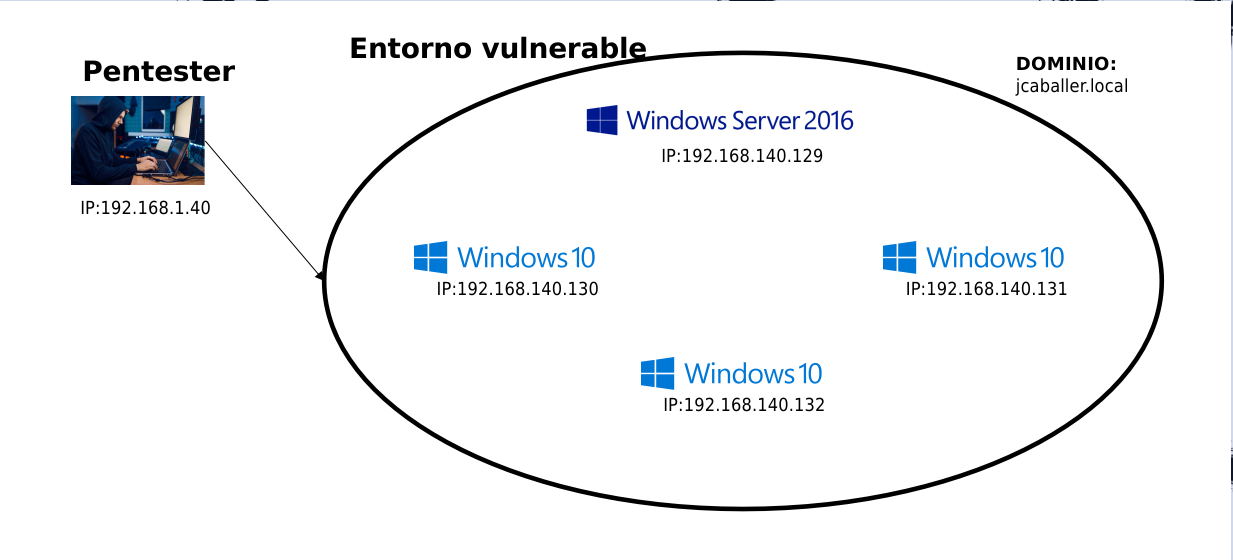 Status after machine recognition
Recognition of services
In the next step, for each of the computers found, a scan of all open ports should be performed in order to find out which services are running on these computers and thus be able to breach them. You can start with the well-known ports or scan the entire range of ports that a computer has directly, both for the UDP and TCP protocols, depending on whether you obtain information on one or the other.
The nmap tool will be used for service recognition, with the command:
1
nmap -sSV -n -Pn -p- -O 192.168.140.X
The different parameters presented in the tool correspond to these purposes:
- sSV: is a combination of two parameters:
- sS: which performs a TCP SYN port scan, “
a SYN packet is sent, as if a real connection were to be opened and then a response is expected. If a SYN/ACK packet is received this indicates that the port is listening (open), while if a RST (reset) is received it indicates that there is nothing listening on the port. If no response is received after a few retransmissions then the port is marked as filtered. The port is also marked as filtered if an ICMP unreachable error is received.” Source - sV: detects the name of the service and the version it runs.
- sS: which performs a TCP SYN port scan, “
- n: used to not perform DNS resolution.
- Pn: used to not perform discovery on the network, as we know on which ip the equipment is located.
- p-: used to search the entire range of available ports in the transport layer of the available network model, from 0 to 65535.
- O: is used to get the operating system of the scanned machine, in this job, it is used to confirm that the scanned machine is the right one.
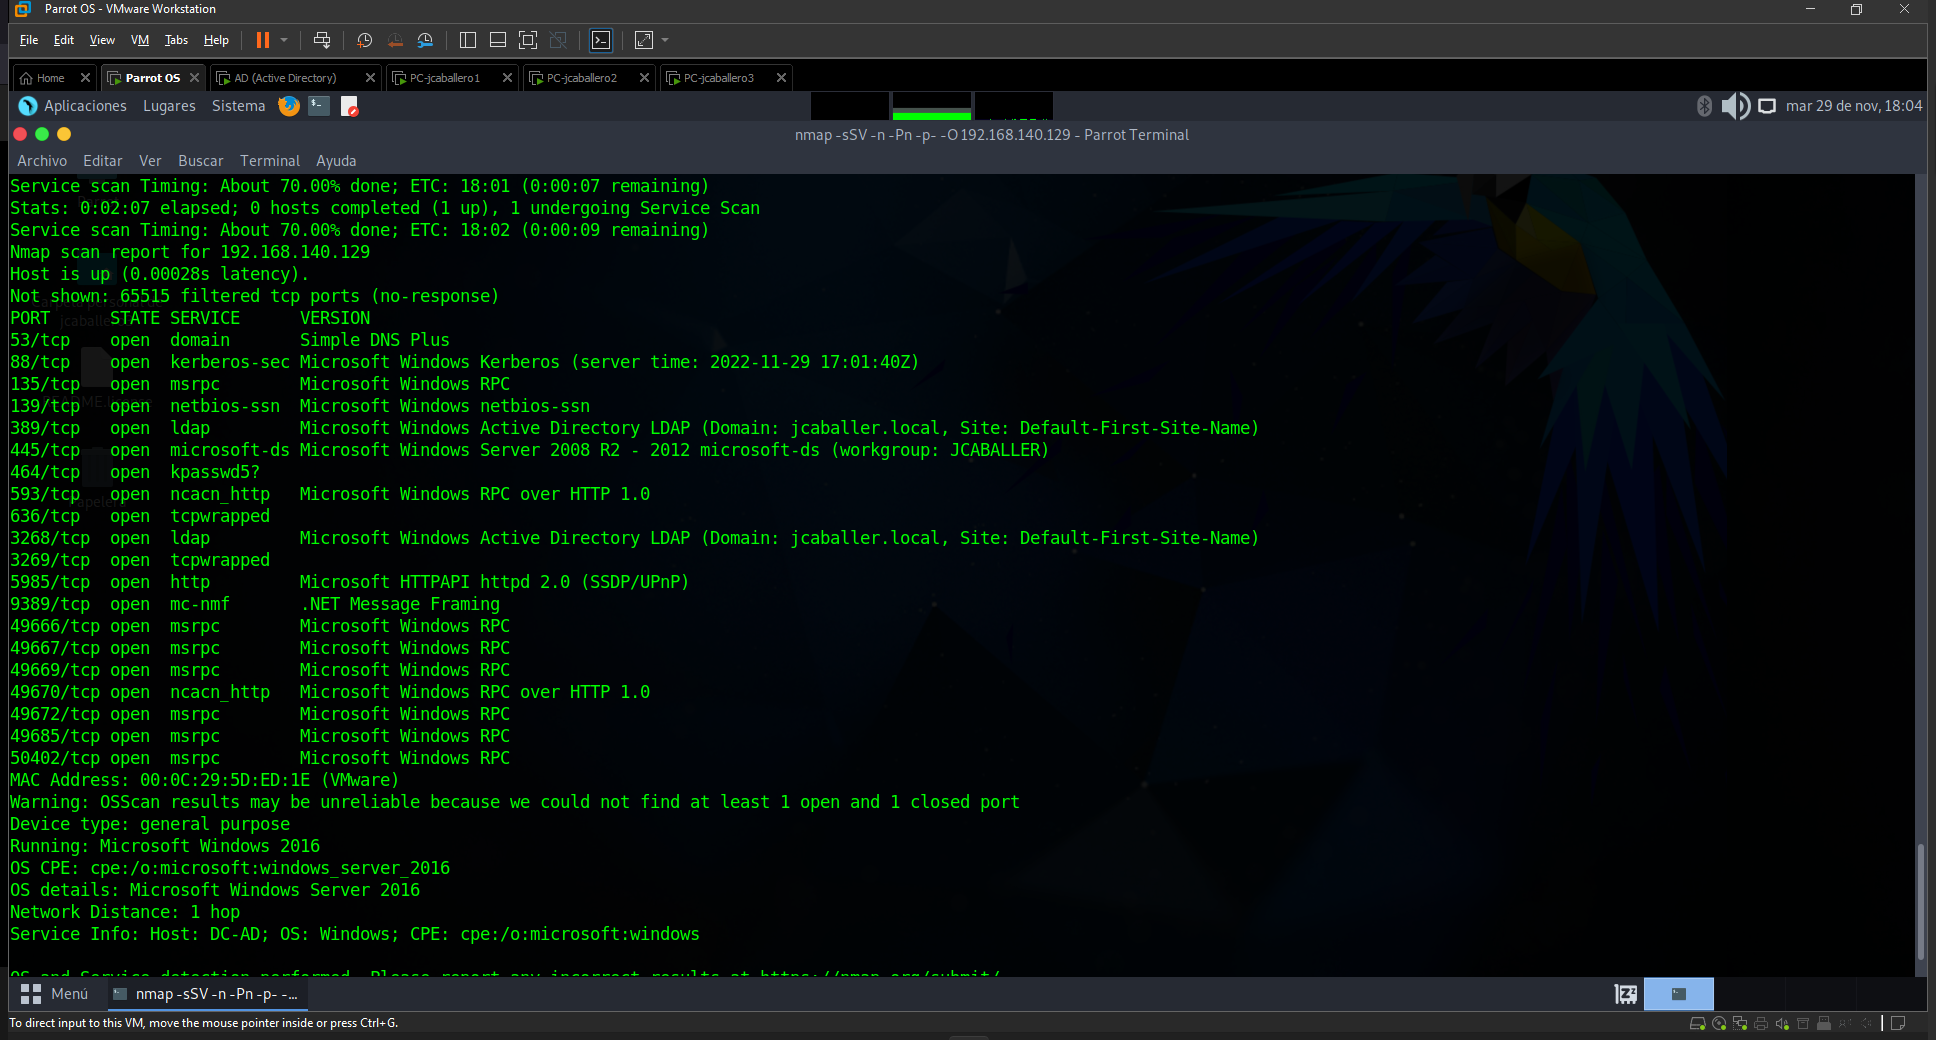
After launching it on the ip: 192.168.140.129 (AD), it gives us all the open ports along with the services running and their versions.
As a result of the command the open ports to be emphasised are:
- 51: which references the DNS query.
- 88: which hosts the Kerberos service.
- 135: allows inter-process communication (RPC).
- 389 and 3268: allowing access to directories to search for network elements (LDAP).
- 139 and 445: allows sharing of items over the network (SMB).
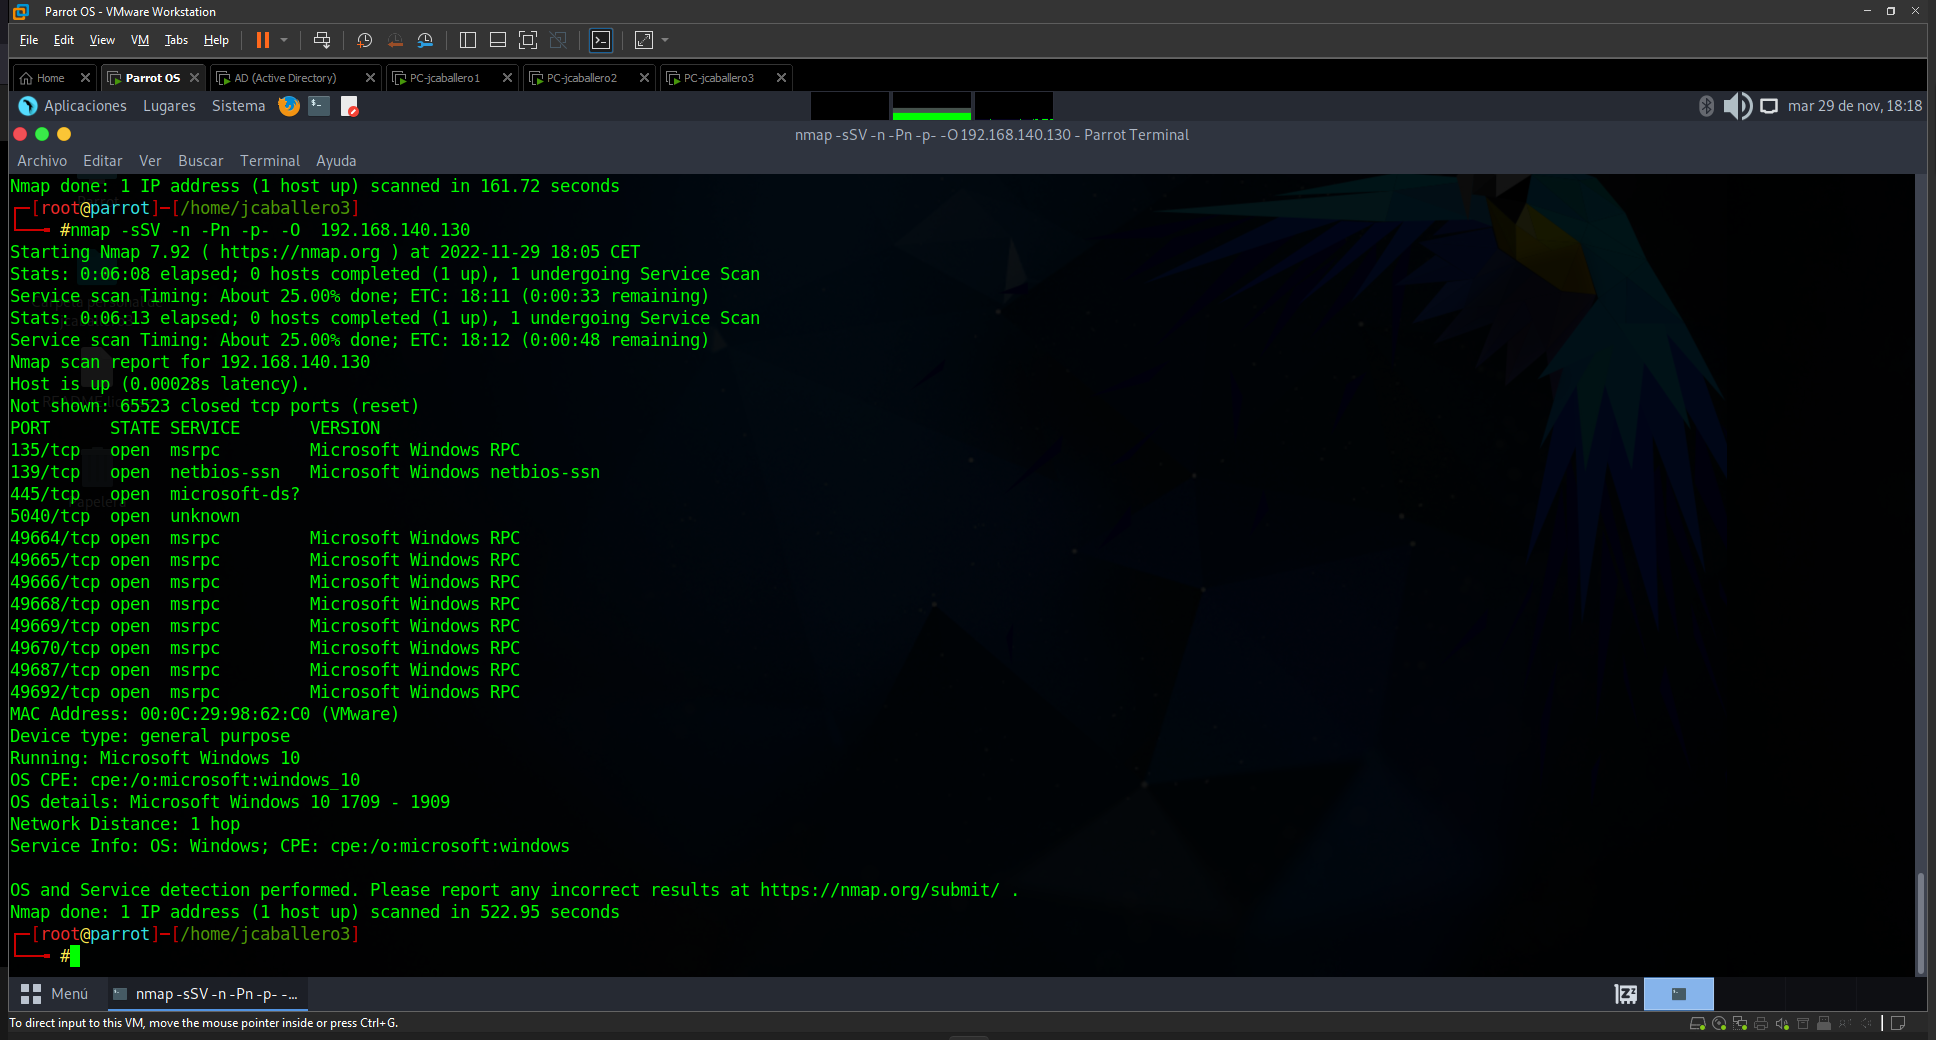
After scanning the rest of the IPs corresponding to the clients, they all have the same open services.
The ports with known services that should be investigated, in this type of equipment, are:
- 135: allowing inter-process communication (RPC).
- 139 and 445: allows the sharing of elements over the network (SMB).
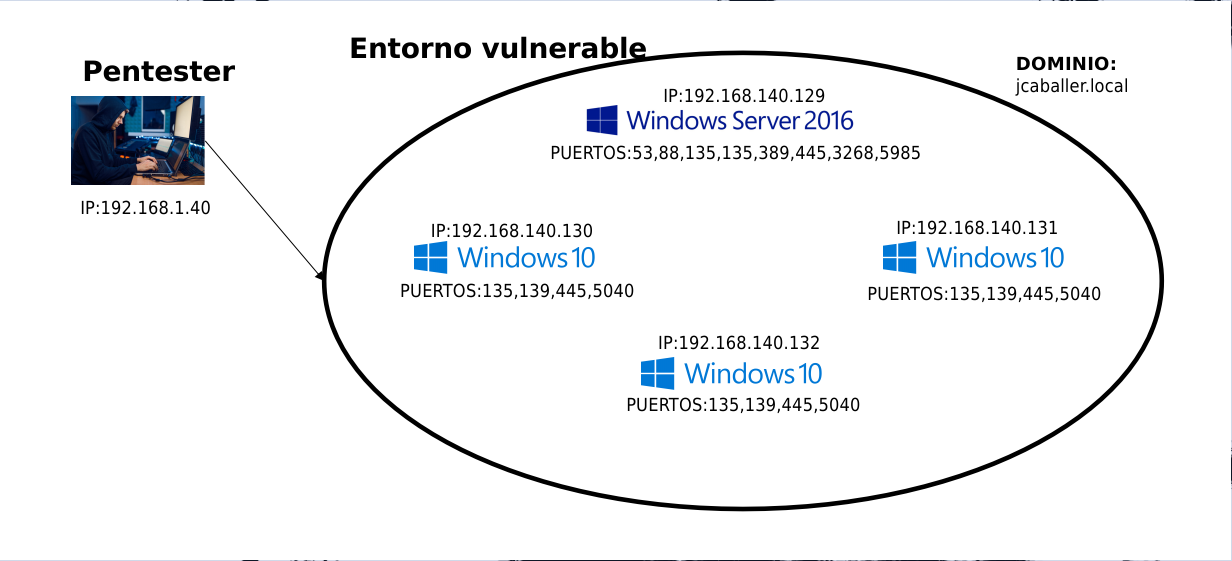 Status after recognition of services
User recognition
Finally, user recognition must be performed, as many of the protocols and services will not provide new information if you do not authenticate yourself or provide a valid username. This is done by brute-force testing potential authenticating users against open services.
As can be seen from the machine recognition, machine names can be quite descriptive when it comes to listing possible users, a brute force attack will be performed using the kerberos protocol, which has been verified to be open on port 88 of the AD and which will be explained later, together with the nmap tool to which we will pass a dictionary with possible users.
The chosen dictionary must be modified to present all the possible options available, among them we will add the pc names, which can generally be used as user names. With the tool cupp, using the dictionary provided, generate new words, in this case users, using the following questions:
- Do you want to concatenate all the words in the list: allows you to permute all the words found in the file.
- Do you want to add special characters at the end of the words: add these characters “!, @, ‘#’, $, %%, &, *”, at the end of each word.
- Do you want to add random numbers at the end of words: add numbers from 0 to 100 to all words.
- Do you want to replace letters with numbers: replace the following characters with numbers in all words a=4, i=1, e=3, t=7, o=0, s=5, g=9, z=2.
The command to use will be:
1
cupp -w file.txt
Finally, after answering all the questions, a new dictionary with extension cupp.txt with 12512 possible users is obtained. The result of the command will be the following:
After launching the nmap command:
1
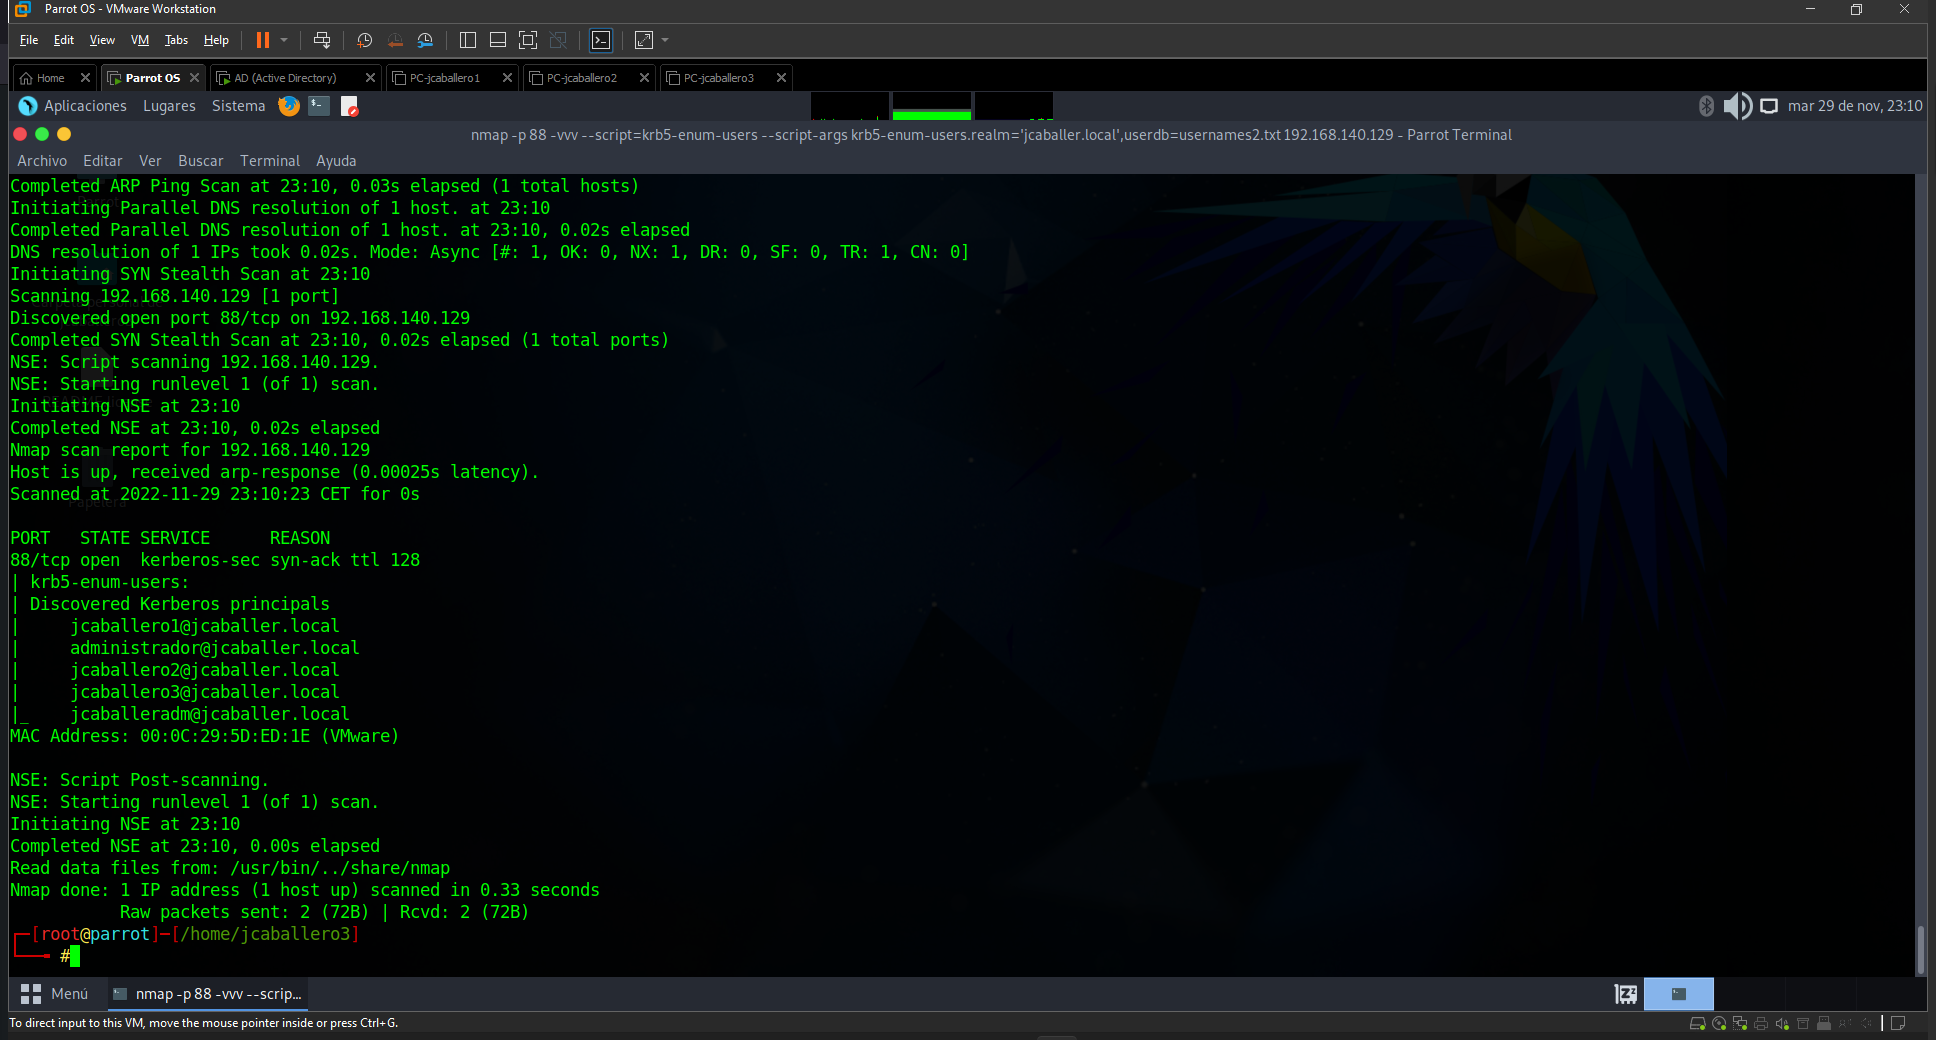
nmap -p 88 --script=krb5-enum-users --script-args krb5-enum-users.realm='jcballer.local',userdb=usernames2.txt 192.168.140.129
That contains the following intermediate parameters and at the end the target ip:
- p: indicates the port over which to attack.
- script: chooses your database script to use.
- script-args: sends to the chosen script the necessary arguments for its execution.
- krb5-enum-users.realm: argument needed for the script “krb5-enum-users” indicating the associated domain of the users.
- userdb: argument required for the “krb5-enum-users” script indicating the dictionary to test on the Kerberos service of the AD.
The result of the command is as follows:
You can see how it returns the users corresponding to the AD (it must be separated in several files because the brute force against the service makes it lose the connection after several attempts):
- jcaballero1@jcaballer.local
- administrador@jcaballer.local
- jcaballero2@jcaballer.local
- jcaballero3@jcaballer.local
- jcaballeroadm@jcaballer.local
Resulting in the following status:
Conclusion
This would be all, in the next post we will introduce the study of open services as well as their possible vulnerabilities.
